
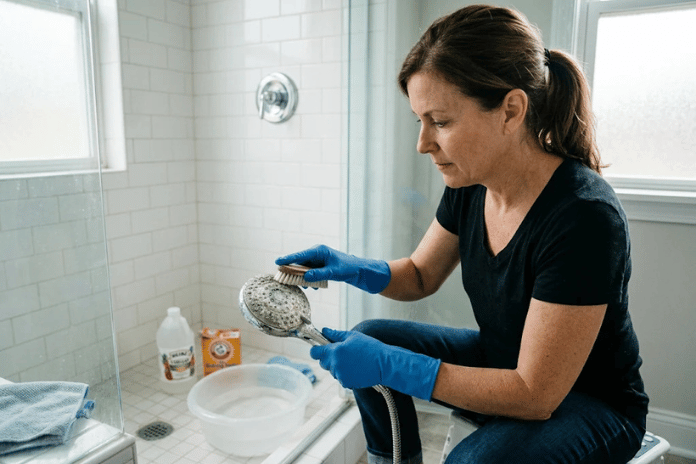
A weak or uneven shower spray often comes from mineral deposits blocking the small nozzles. Learning how to clean shower head buildup can restore flow without replacing the fixture. Most households can handle the job using mild soap, a soft brush, and careful descaling.
Direct answer: Start by wiping the fixture with warm, soapy water and gently brushing the spray holes. For mineral buildup, soak compatible parts in diluted white vinegar, then rinse them thoroughly. Always check the manufacturer’s care instructions first because acidic cleaners can damage some decorative finishes.
Shower Head Cleaning at a Glance
| Cleaning need | Recommended approach | Typical time | Key caution |
|---|---|---|---|
| Light soap residue | Warm water, dish soap, soft cloth | 5–10 minutes | Avoid abrasive pads |
| Clogged rubber nozzles | Soft toothbrush and water | 5–10 minutes | Don’t use metal tools |
| Mineral deposits | Vinegar soak, if finish permits | 30 minutes to a few hours | Check finish instructions first |
| Removable fixture | Detach and soak in a bowl | 30 minutes or more | Protect threads during removal |
| Persistent low flow | Clean screen or inspect plumbing | 15–30 minutes | Shut water off when needed |
Key Takeaways
- Start with the least aggressive cleaning method.
- Check the manufacturer’s care instructions before using vinegar.
- Use a soft toothbrush instead of steel wool or abrasive pads.
- Rinse the fixture thoroughly after using any cleaner.
- Clean more often if your home has hard water.
- Investigate the screen or plumbing if cleaning doesn’t restore normal flow.
Why Shower Fixtures Get Clogged
Tap water contains dissolved minerals, including calcium and magnesium. Those minerals can remain behind when water dries on the fixture. Over time, the deposits may narrow spray openings and create an uneven water pattern.
Soap residue can also collect on the spray face. Moist bathroom conditions may also leave grime around joints and flexible nozzles. A regular cleaning schedule prevents small deposits from becoming harder to remove.
Hard water makes mineral buildup appear faster in many U.S. homes. White or chalky deposits are a common sign of this problem. Reduced flow from only a few nozzles can also point toward localized buildup.
What You’ll Need Before Cleaning
Most basic cleaning jobs require inexpensive supplies already found at home. Start with gentle materials before reaching for stronger products. This approach reduces the chance of damaging a plated or decorative surface.
You may need the following items.
- Mild dish soap.
- Warm water.
- A soft microfiber or cotton cloth.
- A soft-bristled toothbrush.
- A plastic food-storage bag.
- A rubber band or reusable tie.
- Distilled white vinegar, if approved for the finish.
- A bowl for removable parts.
- An adjustable wrench and protective cloth, if removal is necessary.
Avoid steel wool, rough scrubbers, and sharp metal objects. They can scratch surfaces or damage flexible spray nozzles. Manufacturer care instructions should take priority over a general household cleaning method.
How to Clean Shower Head Buildup in 7 Steps
1. Check the Finish and Manufacturer Instructions
Identify the fixture’s finish before applying an acidic cleaner. Chrome, brushed nickel, brass, gold-tone, matte black, and specialty coatings can have different care requirements. Some manufacturers specifically discourage vinegar or other acidic cleaners.
Hansgrohe, for example, advises customers against cleaners containing acetic acid on its shower products. That matters because household vinegar contains acetic acid. Always follow the directions supplied with your specific fixture.
2. Wipe Away Surface Dirt
Mix several drops of mild dish soap with warm water. Dampen a soft cloth and wipe the face, neck, and connection points. This removes soap film before you work on mineral deposits.
Rinse the cloth and wipe the surface again with clean water. Dry the fixture with another soft cloth. Light buildup may disappear without soaking.
3. Gently Brush the Spray Nozzles
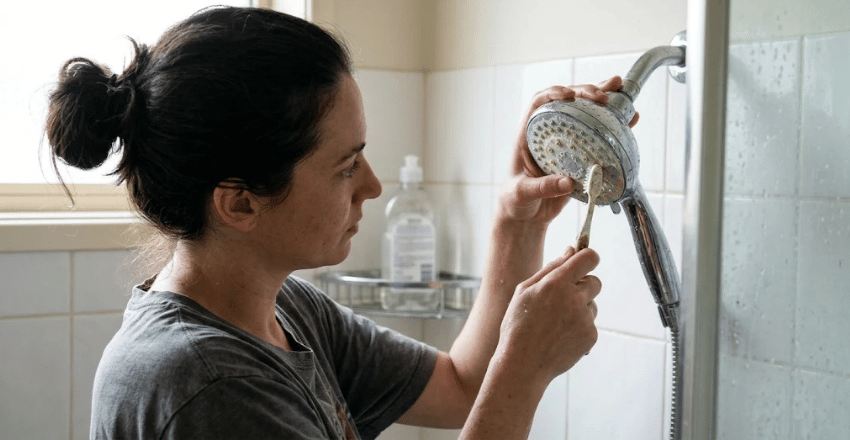
Wet a soft toothbrush with warm, soapy water. Brush across the spray openings using light pressure. Flexible rubber nozzles can often release loose mineral deposits with gentle rubbing.
Don’t push needles or metal pins deep into the openings. Those tools may enlarge or damage the spray ports. A soft brush is safer for routine maintenance.
4. Use a Vinegar Bag Only When the Finish Allows It
If the manufacturer permits vinegar, fill a plastic bag with enough solution to cover the spray face. Secure the bag around the fixture without placing excessive weight on the shower arm. Lowe’s recommends an equal mixture of white vinegar and water for general cleaning.
Keep the soaking period conservative when you don’t know how a finish will react. Decorative metals deserve extra caution because acidic solutions may discolor or dull coatings. Stop immediately if the surface changes appearance.
5. Remove the Fixture for a Deeper Clean if Needed
A removable fixture may be easier to clean in a bowl. Turn it counterclockwise by hand first, if the design allows. Use a cloth between the finish and the wrench if you need extra grip.
Place only compatible parts into the approved cleaning solution. Keep washers, seals, and specialty components out unless their instructions allow soaking. A removable inlet screen can often be rinsed separately.
6. Rinse, Reassemble, and Flush
Rinse every cleaned surface with fresh water. Reinstall any screens, washers, or other components in their original positions. Reattach the fixture without overtightening its threaded connection.
Turn on the water and let it run for about one minute. This helps flush loosened material from the nozzles. Check the connection for dripping before finishing the job.
7. Check the Spray Pattern
Stand back and inspect the complete spray pattern. The streams should appear more even after mineral deposits are removed. Repeat gentle brushing if a few outlets remain partially blocked.
Poor flow that affects the entire bathroom may have another cause. A clogged inlet screen, faulty valve, or household pressure problem could be responsible. Cleaning the fixture won’t correct every plumbing issue.
How Long Should You Soak It in Vinegar?
There isn’t one safe soaking time for every model. General household guides sometimes recommend anything from 30 minutes to several hours. Fixture manufacturers may impose stricter limits or prohibit vinegar completely.
Lowe’s advises limiting brass, gold, and nickel fixtures to about 30 minutes in its general method. Other fixtures may tolerate longer treatment under that guidance. Your manufacturer’s instructions should override generic timing recommendations.
Longer soaking isn’t always better. Acid exposure can affect coatings, seals, or plated finishes. Use the shortest effective treatment, then rinse thoroughly.
How to Clean Without Removing the Fixture
You don’t need to unscrew the unit for routine cleaning. Start with warm, soapy water and a soft toothbrush while everything remains attached. This method handles light residue and many partially blocked nozzles.
A secured cleaning bag can provide deeper contact with mineral deposits. Use that approach only when the finish permits your chosen solution. Never use a bag heavy enough to stress the shower arm.
Cleaning in place also reduces the risk of disturbing washers or threaded connections. It’s a sensible first choice for renters and homeowners unfamiliar with plumbing. Remove the unit only when deeper cleaning is necessary.
Can You Clean It Without Vinegar?
Yes, and a vinegar-free method may be safer for certain finishes. Warm water, mild dish soap, and gentle brushing can remove surface residue. Frequent light cleaning also slows stubborn deposit buildup.
For heavier scale, use a manufacturer-approved descaling product when available. Read the label before applying any commercial cleaner. Never assume a product is safe for every plated surface.
Avoid mixing household cleaning chemicals. Bleach should never be combined with acids, ammonia, or other cleaners. Using one approved product at a time is safer.
What If Water Pressure Stays Low After Cleaning?
First, compare water flow from other fixtures in your home. Normal pressure elsewhere suggests a local shower component may still be restricted. Low pressure throughout the property points toward a broader plumbing issue.
If your model has an inlet screen, check whether debris is trapped there. Waterpik troubleshooting instructions for some models specifically suggest clearing blockages when water flow is missing or weak.
A worn valve, damaged hose, clogged pipe, or pressure regulator problem may require professional attention. Don’t use stronger cleaners if the cause isn’t mineral buildup. At that point, diagnosis is more useful than repeated soaking.
For more household maintenance topics, explore Inrockry’s home improvement guides. Homeowners planning larger water-system projects can also review the site’s septic installation guide. Both resources cover related home-maintenance decisions beyond routine bathroom cleaning.
How Often Should You Clean It?
A light monthly cleaning works well for many households. Homes with hard water may need more frequent attention because deposits return faster. Bathrooms with softer water may go longer between deeper cleanings.
This Old House recommends monthly basic maintenance and periodic deeper cleaning. Its guidance also notes that water hardness and shower usage affect the ideal schedule.
Watch the fixture rather than relying only on a calendar. Uneven spray, visible white deposits, or reduced flow are useful signals. Cleaning before severe buildup forms makes the job easier.
While updating other household systems, you can also browse Inrockry’s guide to avoiding garage-door spring problems. Preventive maintenance works best when small problems are addressed before they cause failures. That principle applies across many parts of a home.
How to Prevent Mineral Buildup
Wipe the spray face after cleaning whenever practical. Removing standing droplets reduces the minerals left behind as they evaporate. This takes only a few seconds after a shower.
Gently wipe the nozzles during regular bathroom cleaning. Don’t wait until several openings are completely blocked. Short maintenance sessions are easier than aggressive descaling.
Persistent scale throughout the house may indicate hard water. A water-treatment professional can test your supply and explain suitable options. Don’t assume a shower filter automatically softens household water.
When Should You Replace the Fixture?
Cleaning can’t repair cracked plastic, peeling coatings, or severely corroded parts. Replacement may make more sense if the damage continues to affect performance. Frequent leaks around the body can also signal a failing component.
Replacement is also reasonable when cleaning produces no improvement, and internal parts aren’t serviceable. Check the warranty before discarding a newer fixture. Some manufacturers provide replacement components for specific models.
Choose a replacement based on compatibility, spray preference, and local water conditions. Water efficiency should also be part of the decision. Check current U.S. labeling and product specifications before purchasing.
Frequently Asked Questions
What is the easiest way to learn how to clean shower head deposits?
Start with warm water, mild dish soap, and a soft toothbrush. This method removes surface film without exposing the finish to strong chemicals. Use a manufacturer-approved descaling method only when mineral buildup remains.
Can I leave a fixture soaking in vinegar overnight?
Only do so when the manufacturer specifically allows prolonged vinegar exposure. Acidic cleaners can damage or dull several finishes. A shorter treatment is safer when the care instructions are unclear.
Can I use baking soda?
Baking soda can act as a mild abrasive, so use caution. Scrubbing too aggressively can mark polished or plated finishes. Manufacturer-approved soap and a soft brush are safer starting points.
Why are only a few spray holes blocked?
Mineral deposits often accumulate unevenly across the spray face. Several openings can clog while neighboring nozzles remain clear. Gentle brushing usually helps when the blockage is near the surface.
Does cleaning improve water pressure?
It can improve flow when mineral deposits are restricting the nozzles or inlet screen. It won’t fix low pressure caused by valves, pipes, or the home’s water supply. Compare other faucets before assuming the fixture is responsible.
Keep the Spray Strong With Simple Maintenance
Regular cleaning can keep a bathroom fixture working well without harsh products. Start gently, follow the manufacturer’s instructions, and use acidic cleaners only on compatible materials. That approach protects both the finish and the small components inside.
If flow remains poor after cleaning, inspect the screen and compare pressure with other fixtures in your home. Persistent problems may need a plumber rather than another soaking treatment. A few minutes of routine maintenance can prevent many common mineral-buildup problems.